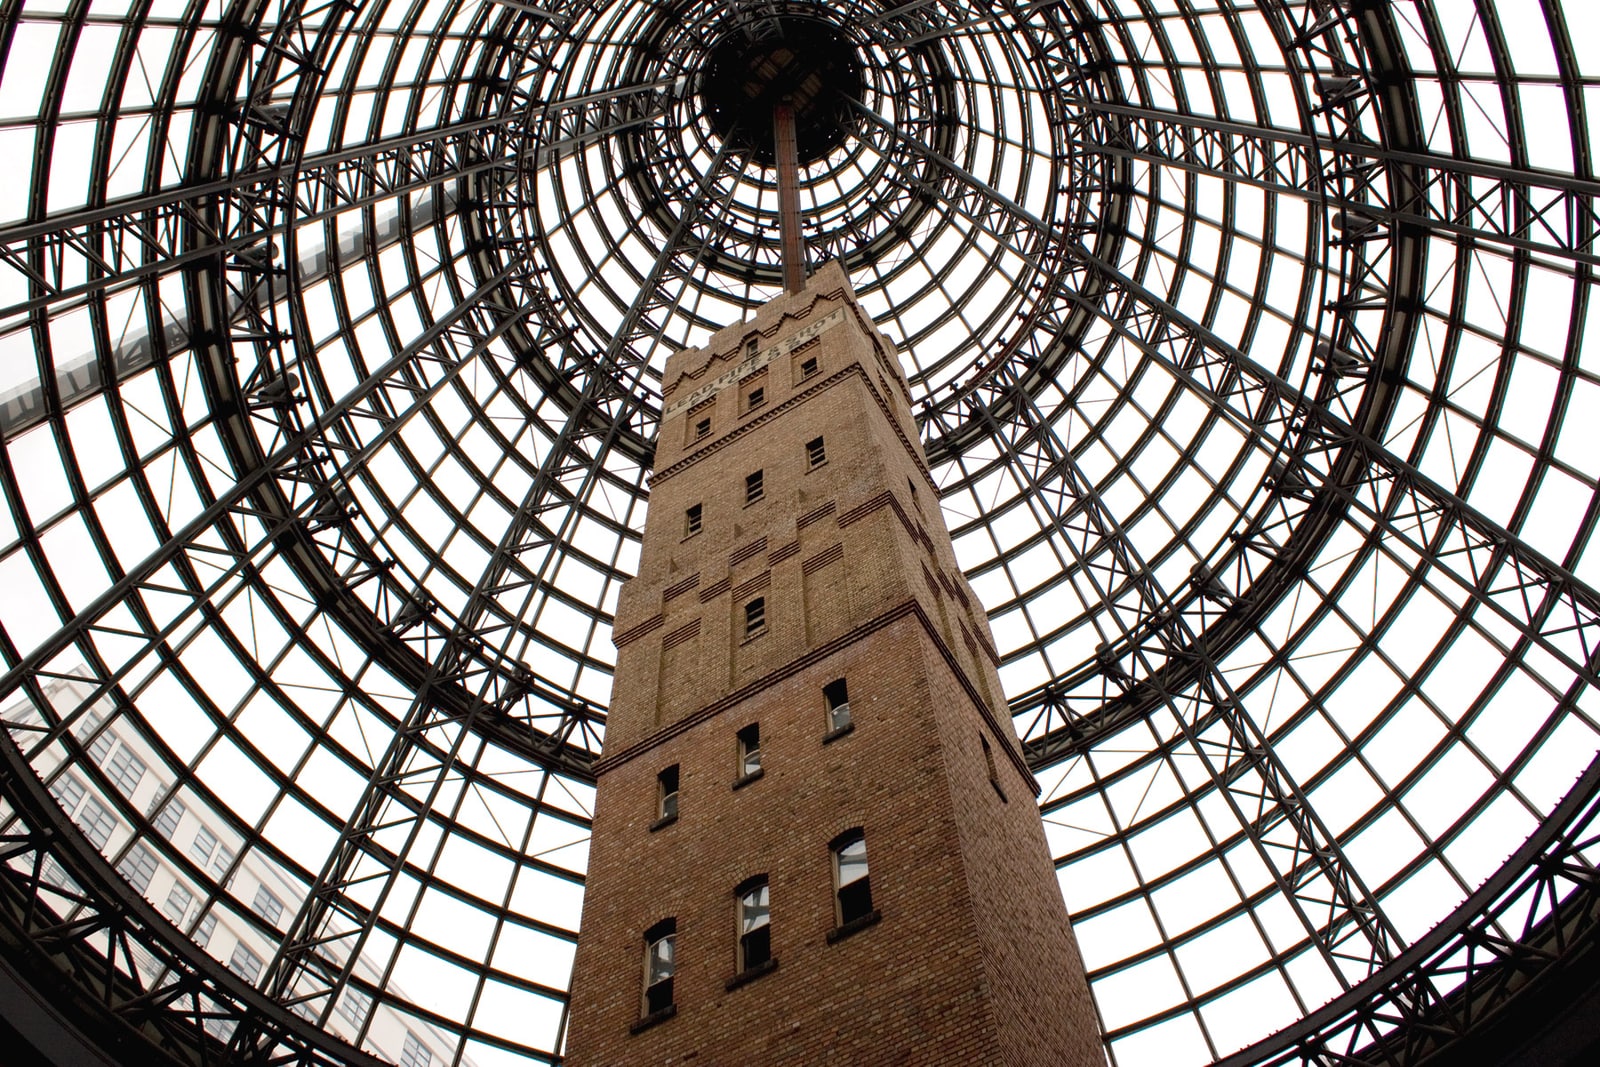
The brick tower inside Melbourne Central has the proportions of a small fortress: narrow windows, thick walls, battlements against the light. Above it, a steel lattice spreads across the glass roof. The relationship looks almost theatrical, but the brickwork had a working life before it became the centrepiece. Coop’s Shot Tower rose in 1889–90; the shopping centre opened around it in 1991.[1] Start with that order of events. The enormous display case arrived a century after its contents.
The arrangement still gives Melburnians something to argue about. In a January 2026 discussion on the city’s subreddit, contributors praised the retained tower and cone while disagreeing about the surrounding centre’s layout. One remembered family trips into town that began with the train and the tower.[2] These are individual recollections, rather than a citywide verdict, but they suggest a rewarding way to visit: give this familiar object some attention of its own.
Find the base, then change your height
Head into Melbourne Central at 211 La Trobe Street and follow the shopping-centre signs towards Shot Tower Square. If arriving at Melbourne Central railway station, come up into the retail concourse. Melbourne Point’s local guide makes the useful distinction: this landmark sits inside the complex, so searching the street for a separate tower entrance wastes the approach.[4] The glass cone is your recognition cue.
I would choose 10:00–11:00 on a weekday, when the shops have opened and there is daylight above the brickwork. That is a suggested viewing window, not a measured promise of quiet. The centre currently publishes 10:00–19:00 hours on Monday to Wednesday and at weekends, extending to 21:00 on Thursday and Friday; holiday and individual-store hours can differ.[5] For a first look and photographs, Melbourne Point recommends 15–30 minutes.[4]
Begin on the public concourse beneath the cone. Let your eye travel up the tower before raising the phone. Then use the surrounding public retail levels for a second, higher view, as the local guide recommends.[4] From below, the structure’s height dominates; from alongside it, the windows and brick courses become easier to read. Take photographs after stepping clear of the escalator landing. In the local discussion, frustration with obstructed circulation sits beside affection for the building.[2] It is still a route through someone else’s day.
A building shaped by a falling droplet
The 50-metre tower was a piece of manufacturing equipment. Workers took lead to the top, melted it and poured it through perforated equipment. Falling droplets became spherical shot before collection in water below. The Coop business also supplied such ordinary necessities as washers, solder and lead pipe.[8] The imposing height belonged to a production process that ended with objects small enough to hold in a hand.
Knowing that changes the view. Follow the building vertically and imagine the work travelling down its length. Those repeated windows cease to be merely an attractive pattern. The tower’s proportions begin to explain the job it was built to do.
Its later enclosure answers a different problem. Heritage protection required the tower to survive redevelopment; architect Kisho Kurokawa placed it inside the great glass cone.[1] You can read the two structures together: masonry containing a fall, glass admitting light around the surviving machinery’s shell. The shopping floors give you several positions from which to notice that relationship.
There is one expectation to leave at the base. Melbourne Point explicitly says visitors cannot climb to the top.[4] Treat the public upper levels as your change of viewpoint. A tower can explain its height perfectly well without selling you the ascent.
The museum door belongs to a boot shop
The smaller discovery is at the bottom of the great object. Melbourne Playgrounds’ local review describes a museum with shot-making equipment, explanations of the process and displays about the city’s development. Its practical direction is easy to miss: access is through R.M. Williams.[6] A visitor looking only for a civic museum doorway could walk straight past.
Find the shop on Level 1, the location in the centre’s current store listing, and ask staff for the Shot Tower Museum entrance.[7] Sources describe the display as being on the tower’s second floor; using the named shop and the centre’s level number avoids making those two numbering systems into a puzzle.[1][6][7] The museum is listed as free.[6] There is no need to turn the enquiry into a shopping purchase.
Allow an additional 10–15 minutes, my planning allowance for reading a small display rather than an advertised tour length. The public tower view needs no reservation; museum access is worth confirming with staff on arrival, as Melbourne Point advises.[4] If the display is your main reason for coming, the R.M. Williams listing gives 03 9663 7126. Ask about access before making a special journey, particularly if you need a route without stairs.[7]
For this short stop, I would budget A$0–10: viewing and the museum are free, while the upper figure is an optional refreshment allowance, not an admission charge or a quoted café price.[4][6] Transport is separate. You can spend nothing here and still have seen what you came for.
Return to the concourse for a final look upwards. The local family memory of arriving by train is a useful companion to the manufacturing story: the same object has marked a working district, survived redevelopment and become part of a day in town.[1][2] Once you know why the brick tower is tall, the glass around it becomes more interesting too. It preserves enough room to see an old industrial task in the middle of an ordinary shopping day.
Sources
- Melbourne Central, “Melbourne Central’s Heritage” — operator’s account of the 1889–90 tower, shot manufacture, heritage protection, Kisho Kurokawa’s cone and the centre’s 1991 opening; checked 24 October 2026.
- r/melbourne, “Alternate designs for Melbourne Central Shopping Centre. Are any of them better than what we ended up with?”, 11 January 2026 — recent local community discussion of the retained tower, circulation and family memories; anecdotal accounts.
- Rexness, “Melbourne Central – Coop’s Shot Tower”, April 2010, Wikimedia Commons — photograph, attribution and CC BY-SA 2.0 licence.
- Michael Jones, Melbourne Point, “Coop’s Shot Tower” — Melbourne-based visitor guide on concourse and upper-level views, free access, a 15–30-minute visit, museum enquiries and the absence of a public tower climb; checked 24 October 2026.
- Melbourne Central, “Opening Hours” — current centre hours and the distinction between centre and individual-store trading; checked 24 October 2026.
- Melbourne Playgrounds, “Shot Tower Museum (Central Melbourne)” — local review of the displays, free admission and access through R.M. Williams; checked 24 October 2026.
- Melbourne Central, “R.M. Williams” — official store location on Level 1, contact telephone and trading hours; checked 24 October 2026.
- Heritage Victoria, “Coop’s Shot Tower”, Victoria’s Open Heritage No. 1, May 2007 — Victorian Government brochure explaining the tower’s working height, shot manufacture and other lead products, preserved by the Victorian Government Library Service.